Har-Bal Spatial Pan Help
Welcome to Har-Bal Spatial Pan, the plugin software that introduces a new approach to pan placement in mixing.
Manual
Introduction
HarBal Spatial Pan is fundamentally about creating early reflections at contextually appropriate levels to imply a given geometry. In conventional recording early reflections are typically handled exclusively by a reverb processor or a chorus effect or both. The fundamental problem with that approach is that the early reflections in a real environment is the result of the first reflections off walls and ceiling and these change with performer position. However, early reflections synthesized within the reverb processor will result in all performers having exactly the same early reflections irrespective of performer position. This is clearly wrong in a physical sense and sets up an acoustic contradiction in the sense that the early reflections are implying one position yet the pan setting is implying another. At best it is an approximation of the situation where all performers are in a central mass in a large stage, where the early reflections from each performer are approximately the same, although how often is this the case in real studio mixes?
At a fundamental level early reflections should be part of the panning and not part of the reverberation process. Har-Bal Spatial Pan provides this early reflection processing through a simple two dimensional model that models the signal paths from performer to listener, both directly and through five additional ray traced paths as indicated in the figure below.
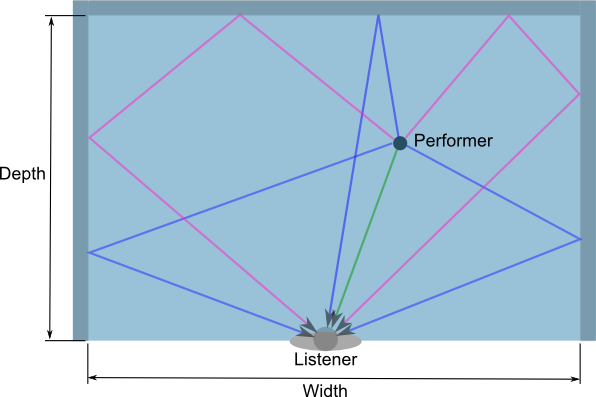
The Paths Modelled in Spatial Pan
The direct path has no introduced propagation delay whereas the reflected paths include delays that account for the path length difference between the reflected and direct paths (sound travels at around 345 m/s creating audible delays with distance). The direct path has no delay to ensure that the timing between parts in a mix does not change with changing position, only the reflection delays change. Another aspect the model also includes is attenuation with distance (6dB for every doubling of distance past the near field / far field transition point). Thus, as the performer is moved away from the listener the level drops and becomes increasingly similar in volume to that of the reflected paths resulting in the sense of distance.
The modelled reflections also include the incident angle of arrival at the listener which is modelled through the Wide Pan algorithm. This algorithm is built around the notion of reconstructing the approximate head transfer function for a given pan position as a linear combination of the output from two speakers in a stereo equilateral triangle configuration.
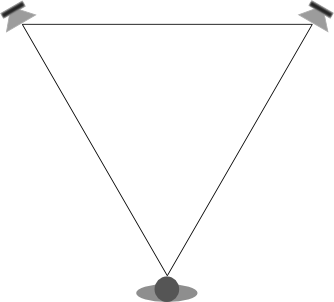
Assumed Listening Configuration for Wide Pan Algorithm
The Wide Pan algorithm is effective over an arc of +/-90 degrees angle of incidence relative to the listener. As such, Spatial Pan only models reflections forward of the listener. The listener position, whilst adjustable horizontally, remains fixed to the base line of the modelled space. Despite these restrictions it provides realistic synthetic early reflections that closely mimic the behaviour of regular sound spaces. As most mixes will only ever want the performer forward of the listener the restrictions within Wide Pan typically do not form an impediment. Whilst contrasting technologies using head transfer function modelling can resolve position in an arc of +/-180 degrees they are computationally expensive. Wide Pan in contrast, is very cheap and not much more expensive than implementing conventional panning. As such, Spatial Pan can be applied to many channels simultaneously without presenting a computational load problem to your digital audio workstation. Although specifically design for stereo speaker sound reproduction, Spatial Pan still provides a pleasant listenening experience in stereo headphones very much similar to the manner in which current stereo mixes translate to headphones.
The reflections themselves include a loss model which is parameterised by an all-band loss component plus an additional high frequency loss component to account for the deadening of higher frequencies in typical real spaces. This is implemented using a first order lead-lag filter with the response characteristic as illustrated in the figure below.

The High Frequency Loss Behaviour for Different HF Loss Settings, HF Transition 1kHz
The all band loss term is added to the high frequency loss term. For instance, with an all band loss term of 5dB (just referred to as Loss in the user interface) the following loss behaviour results. Note that the shape is exactly the same as above but the low frequency loss begins at -5dB instead of 0dB in the previous case.

The High Frequency Loss Behaviour for Different HF Loss Settings and an All Band Loss of 5dB, HF Transition 1kHz
Remember that the reflection model only models 5 different reflection paths in the horizontal plane, so whilst it sounds quite realistic it lacks the complexity of a real performance space which will have many more early arrival reflections of differing strengths. To add extra complexity to the early reflections Spatial Pan also includes a 7 tap tapped delay line in series with the reflection processing. In a physical sense this can be thought of as adding orthogonal floor to ceiling reflections (by that I mean reflections that follow the main reflection path when viewed from above) to the existing 5 reflection paths. This then gives a model that totals 35 reflection paths. These added reflections are referred to within the wall reflection model as diffusion. This behaviour is illustrated in the Figure below.
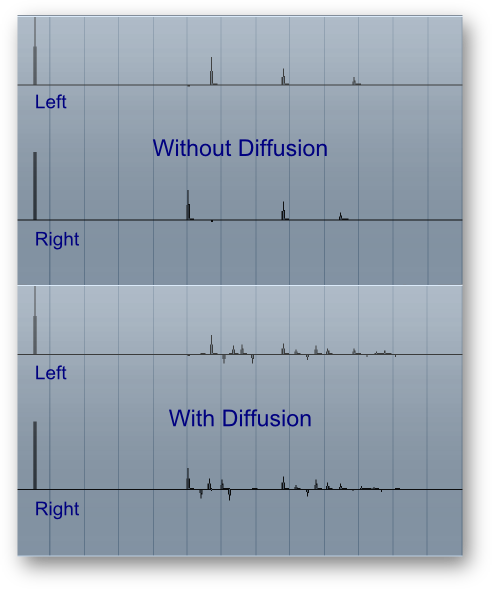
A Typical Impulse Response of Spatial Pan when Panned Slightly Right Illustrating the Change that Diffusion makes to the Response
To make clear the connection between early reflections and position and how they are tied together, consider the figure below which shows the impulse responses for two postions : one fairly central and closer to the listener but panned slightly right and the other widely panned to the left and further away from the listener. Note in particular the very different reflections between the two positions. These reflections serve to further define the location of the listener and the location of the walls and rightly change with position. In contrast, using a fixed reverb processor or chorus effect to simulate early reflections will result in a common reflection pattern for all channels sent through it irrespective of the channel panning. Such an approach will likely sound less realistic because of the acoustic ambiguity set up between the pan position and what the modelled early reflections are telling your brain about position. In contrast, Spatial Pan provides early reflections that are consistent with the position to within the accuracy of the panning model and is therefore less likely to sound acoustically ambiguous.

Typical Impulse Responses of Spatial Pan when Panned to Different Locations Illustrating the Connection Between Unique Early Reflections and Position
Downloading and Installing
To download the software after purchase go to the Har-Bal downloads page and log in using the Customer Name and Order Number as it appears on your purchase invoice as shown below. You should save this information in a safe place (the Customer Name and Order Number) as you can use it at any time to download your software and will need it to create new license keys when needed.
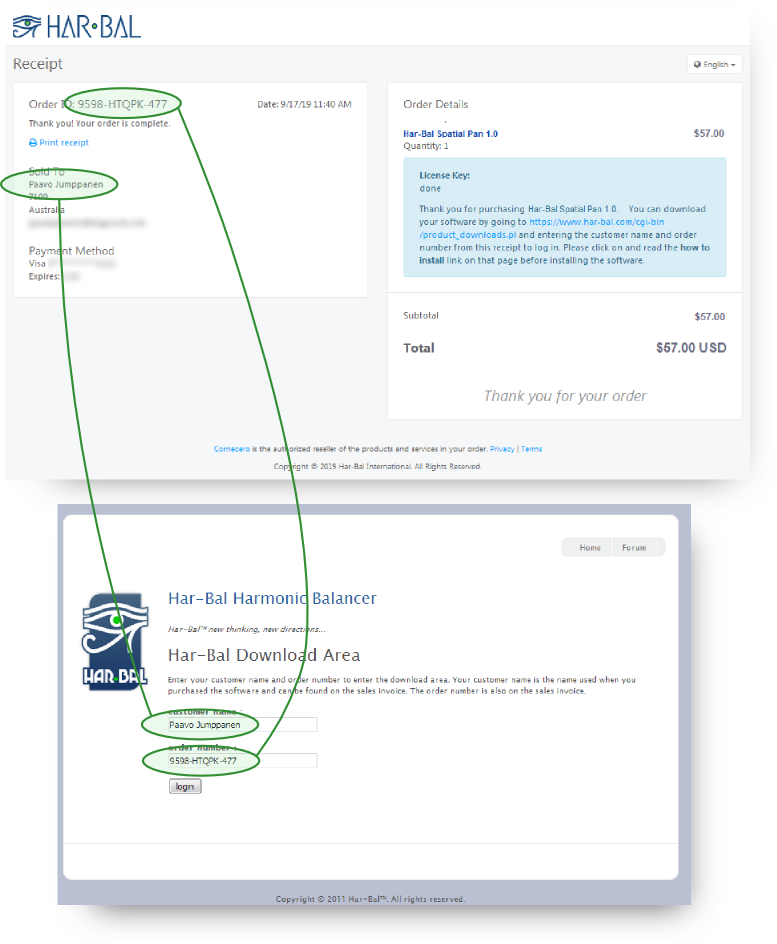
How to login to the downloads page
On successful login you should see the products you can download, which should include all versions available for all supported platforms. You are free to use any or all of the supported versions. Please note that after making a purchase it may take a few minutes before your purchase is fully processed and until that happens you will not be able to log in. When successful you should see a page like this.
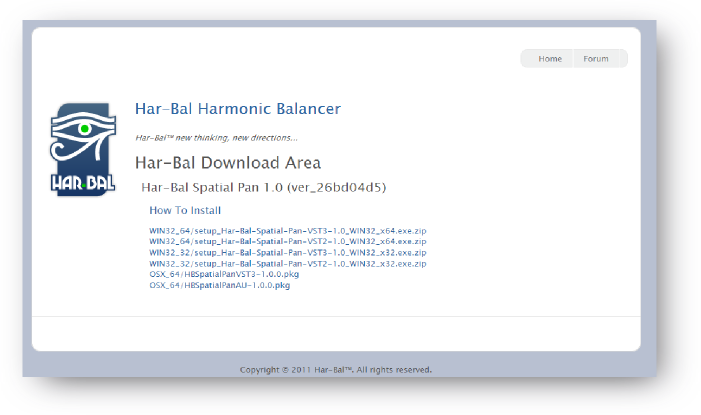
The content of the downloads page when logged in
Download the product appropriate for your operating system and digital audio workstation(DAW). Once the download is complete extract the installer from the zip file and run it to install.
When used for the first time in your DAW it will be unlicensed and inactive. To license the plugin first press the Create button on the license form and press the save button on the save as dialog box. This will save the license.html file to disk and open the form in a web browser. If the form does not open you may not have a web browser file association for .html files. In that case simply note where you have saved the license.html file to and open it with a browser manually. If your DAW is on a machine never connected to the internet then save the license.html file to a thumb drive by pressing the save button and transfer it to a machine that is connected to the internet and open it there. Then transfer the license key back to the install machine.

The not licensed dialog box
In the open request license form copy the the Customer Name and Order Number from your order receipt into the appropriate places and press the request button. A new license key should then be created and downloaded. If downloading fails check your browser or try a different one. The licensing system is known to function properly with Google Chrome and Mozilla Firefox. Also be aware that your computer firewall and or internet security protection may be preventing both the license key download and its installation. In the case of problems you should try disabling internet security during the installation and activation process.
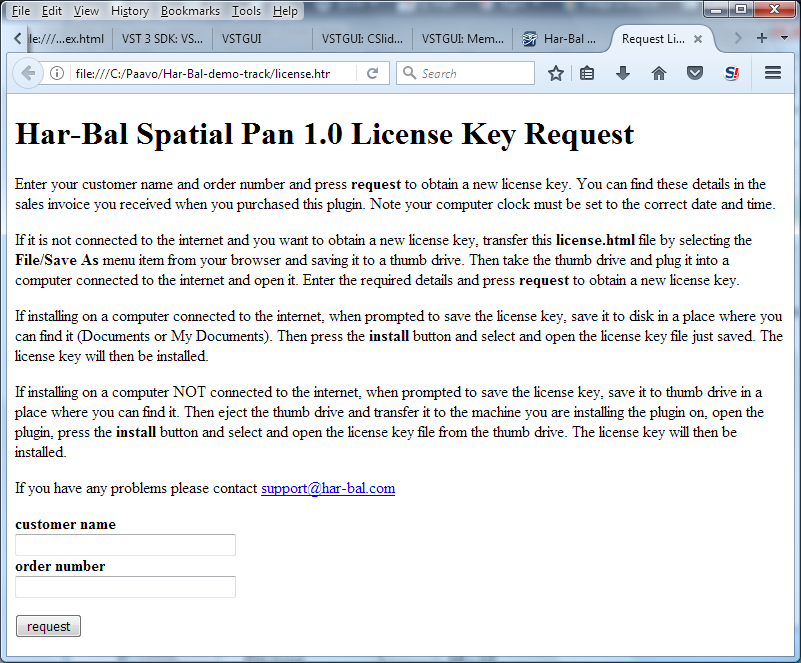
The Request License Key form
The browser will typically prompt whether to open or save the file. Choose to save the file to disk and note where it is saved to and the name of the file.
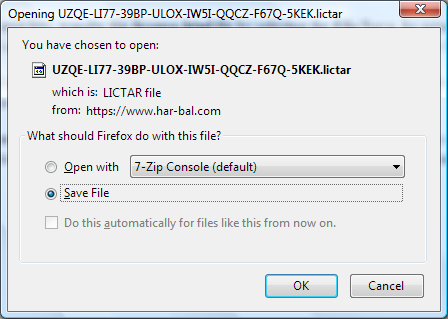
Saving the downloaded license key
Then return to the Har-Bal Spatial Pan unlicensed dialog and press the install button and select the license file you just downloaded. On pressing the Open button the key will be installed and Har-Bal Spatial Pan activated.
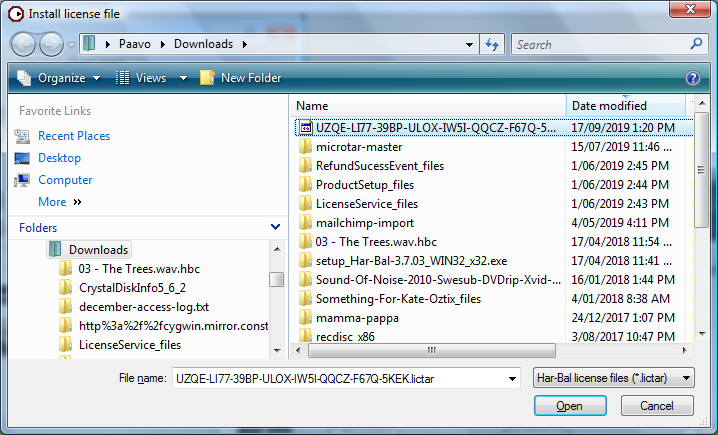
Installing the downloaded license key
Control Panel Overview
The control panel for Spatial Pan is shown below and comprises the following:

Control Panel Overview for Har-Bal Spatial Pan
1 – Performance Space Walls
These walls provide the early reflections and can be turned on or off.
2 – The Performance Space
This is the area which contains the Performers, the name given to channels which have the Spatial Pan plugin as an effect.
3 – The Performers
Each Performer is represented by a moveable circle icon that can be labelled, has level animation and can be soloed or muted. There is one Performer for each channel having a Spatial Pan plugin with the common geometry given in 8.
4 – The Listener
The Listener represents the position of the listener relative to the performers and can be panned left or right, leading to the stereo image shifting right or left. To drag, Left Mouse Button Down on the Listener and drag to the desired position. The efficient panning model that Spatial Pan uses is restricted to pan position over a +/-90 degree arc. For that reason the Listener is confined to the base line and Performers cannot move behind it.
5 – Scale Lines
The scale lines represent the relative scaling applied to the width and depth axes of the performance space. These are provided because for highly elongated spaces the aspect ratio of the display is restricted to make positioning of the performers easily possible. The scale lines show the relative scale between width and depth axes.
6 – Maximise / Minimise Button
To make accurate placement easier the performance space can be maximised by clicking on the maximise button. Doing so results in the performance space taking up as much space as is practically possible for the display without showing the controls responsible for defining the geometry to maximise the space further.
7 – Geometry Width, Depth, Far Field Distance and Volume Normalisation
Width
The Width of the Performance Space in metres. This parameter is automatable but may result in adjustment artefacts. Holding down the shift key while adjusting this parameter results in both Width and Depth being adjusted simultaneously with a constant performance space aspect ratio.
Depth
The Depth of the Performance Space in metres. This parameter is automatable but may result in adjustment artefacts. Holding down the shift key while adjusting this parameter results in both Width and Depth being adjusted simultaneously with a constant performance space aspect ratio.
Far Field Distance
The Far Field Distance controls the distance from the Listener at which sound level attenuation with distance transitions from the constant volume of near field to the 6dB per doubling of distance in the far field. This parameter is automatable.
Normalise Volume
Normally Spatial Pan includes the effect of distance from the listener in determining the volume of that performer (things further away are quieter). There are instances where you might want this volume change effect removed so that the volume of the performer does not change with distance from the listener. This is the purpose of the Normalise Volume button. Note that with normalisation enabled the volume distance effects for the reflections are still accounted for but the overall attenuation is reduced by the amount that would have occured for the direct path.
8 – Geometry Selector
Clicking on the Geometry Selector edit field will activate text editing, allowing you to change the name of the geometry. Note that in doing so you will be changing the geometry associated with this plugin instance and will therefore result in a change of performers being displayed in the performance space. Remember that only performers in “this” geometry are displayed in the space. All known geometries will be visible in the pop up list which you can access by clicking on the up arrow to the right of the edit field. Clicking on a named geometry in that list will re-assign the geometry to the one clicked and geometry parameters will update accordingly.
9, 10 & 11 – Wall controls
Wall
The Wall button controls whether the given wall (left, rear or right) is present in the modelled space. Holding down the SHIFT key whilst clicking on the Wall button will toggle the left, rear and right Wall buttons as one.
Diffusion
The Diffusion button controls whether the given wall (left, rear or right) has the diffusion component included in the reflection modelled. Holding down the SHIFT key whilst clicking on the Diffusion button will toggle the left, rear and right Diffusion buttons as one.
Loss
The Loss knob controls the given wall (left, rear or right) reflection loss (in dB). Holding down the SHIFT key whilst adjusting the Loss knob adjusts the left, rear andright Loss as one.
HF Loss
The HF Loss knob controls the given wall (left, rear or right) high frequency reflection loss (in dB). Holding down the SHIFT key whilst adjusting the HF Loss knob adjusts theleft, rear and right HF Loss as one. The HF Loss adds to the Loss and the transition between low frequency and high frequency loss behaviours is governed by the HF Transition parameter.
HF Transition
The HF Transition knob controls the given wall (left, rear or right) high frequency loss transition frequency (in kHz). Holding down the SHIFT key whilst adjusting the HF Transition knob adjusts the left, rear and right HF Transition frequencies as one.
12 – Bypass
The Bypass button bypasses the reflection model processing for all performers in the given geometry simultaneously. However, if the source channel is a stereo channel the bypassed output will be left-right summed and monophonic.
13 – Help
This button opens the help documentation for this plugin.
Usage Overview
Performance Space
Both listener and performer positions are scaled relative to the actual geometry size so changing the geometry size, whilst changing the actual positions in physical units, has no effect on relative position. This allows you to quickly assess how different size spaces change the sound. The listener can move horizontally along the base line by mouse down and drag operation. The performers can be moved anywhere in the space by using a left mouse button down and drag operation.
Performer level can be adjusted through a gain parameter. To do so mouse over the performer and press and hold down the L key, then left mouse button down and drag up or down to increase or decrease the gain. When the L key is down all performer levels are displayed but on releasing the L key only the level of the performer being adjusted is shown. Note that on DAWs that restrict keyboard input (Sonar Cakewalk for example) you will need to enable keyboard input for the plugin for this and any of the other key modified behaviours discussed here to work.
Performers can be labelled by mousing over the performer and pressing the E key. This will open an edit field where you can type the name and hit enter, upon which the label will be displayed.
Performers can be Soloed and Muted by mousing over and pressing the S or M key.
The performance space has two white lines (horizontal and vertical) which represent the “scaling” of horizontal and vertical axes in the performance space. This is useful to understand the geometry when it is narrow in one axis as the aspect ratio is restricted to prevent the space collapsing to a size that is unusable for adjustment of position.
Click on the top right hand corner of the performance space to hide the geometry controls and maximise the adjustment space. This is an aid to editing when performers are close to one another. How big the control window becomes will depend on the available screen space and the aspect ratio of the performance space.
Group Operations
Performers can be grouped to aid in the control of performer position. To group, press and hold down the SHIFT key while clicking on the performers you wish to group and then press the G key. Now clicking on any one of the group will result in a selection ring being displayed for all members of the group. Grouping is not nested so if re-grouped into another group the parent group will be lost and merged into the new on. To ungroup left mouse button down on one of the group members and press CTRL + G to ungroup all members. Dragging a grouped member with left mouse button down and no keys depressed will only move the clicked on performer and not the rest of the group. This is by design to allow you to alter the position of a performer in the group. For group operations we use an additional key press before left mouse button down operation.
Holding down the P (pan) key while dragging a group member moves the entire group in the direction of the mouse movement.
Holding down the H (Horizontal) key while dragging a group member will enter horizontal scaling mode where the group is spread or contracted in the horizontal plane according to up and down movement of the mouse.
Holding down the V (Vertical) key while dragging a group member will enter vertical scaling mode where the group is spread or contracted in the vertical plane according to up and down movement of the mouse.
Holding down the D (diagonal) key while dragging a group member will enter diagonal scaling mode where the group is spread or contracted in both the vertical and horizontal planes equally according to up and down movement of the mouse.
Holding down the R (rotate) key while dragging a group member will enter rotational mode where the group is rotated about its centre according to up and down movement of the mouse.
Once any of these modes is entered the key can be released and the mode will continue for as long as the dragging operation occurs. You can also click and release any of the P,H,V,D,R keys to change modes at any time during that drag operation. All modes display an icon to indicate the mode in the middle of the group. However, to enter a group operation the key must be drepressed before the left mouse down operation in the first instance.
Geometries
The concept of a Geometry in Spatial Pan is the grouping of all the parameters that define the behaviour of a space. This includes the Wall enabled, Diffusion enabled, Loss, HF Loss and HF Transition parameters for all walls as well as the Width, Depth, Far Field Distance and Normalise Volume enabled parameters. These are collected under the banner of a geometry name that appears in the user interface shown above. Apart from defining the common characteristics of a space, this also serves as a means to identify which space a particular perfomer will be appearing in. There is one performer per instance of Har-Bal Spatial Pan plugin and that performer appears in the named space. This grouping by geometries is how Spatial Pan is able to display multiple performers in the one plugin user interface and adjust those performers within that one interface. It is not something catered for in the plugin architecture API but something implemented on top of it by virtue of global shared memory in all Spatial Pan plugin instances. For this reason you should be aware that (WARNING) Opening multiple DAW Sessions / Projects on the one computer can lead to confusing behaviour because the plugin has no way of identifying which Session / Project a particular plugin instance belongs. For instance, if Project A has one instance of Spatial Pan in the Geometry Common and so too does Project B, and if both are opened at the same time then both performers will appear in both the control panels of the Spatial Pan plugin instances even though they exist in seperate projects. It is important to be aware of this limitation and to either avoid opening multiple projects simultaneously or naming the geometries uniquely to avoid the situation from occuring. For simplicity sake I would suggest the former rather than the latter.
Automation
The following parameters are automatable:
- Bypass
- Geometry Width
- Geometry Depth
- Far Field Distance
- Left Wall Enabled
- Left Wall Diffusion Enabled
- Left Wall Loss
- Left Wall HF Loss
- Left Wall Transition Frequency
- Rear Wall Enabled
- Rear Wall Diffusion Enabled
- Rear Wall Loss
- Rear Wall HF Loss
- Rear Wall Transition Frequency
- Right Wall Enabled
- Right Wall Diffusion Enabled
- Right Wall Loss
- Right Wall HF Loss
- Right Wall Transition Frequency
- Performer X
- Performer Y
- Performer Solo
- Performer Mute
- Performer Gain
- Listener X
Note that the Geometry Width, Geometry Depth and Far Field Distance parameters are automatable for flexibility sake but may result in adjustment noise. This is expected behaviour.
Furthermore, owing to limitations in the manner in which automation is handled within AU (Audio Unit) plugins, it is not possible to adjust multiple parameters with the same ID in parallel. However, automation is still usable in the AU plugin implementation but the Latch automation mode must be used. On VST3 plugin implementations there is no such limitation and all automation modes can be used and work as expected.
Stereo Channel Requirements
It is important to note that for Spatial Pan to be able to function correctly it will require that it is used as an effect on a stereo channel. Typically most recorded tracks will likely be monophonic but most digital audio workstations provide a means to force stereo bus operation on a given channel. The noteable exception is Cubase LE, the free version of Cubase that is often bundled with hardware purchases. It has no means to force a mono track to stereo. A simple workaround to this limitation in Cubase LE is to make a new stereo track and select and drag the recorded music content from the mono channel to the new stereo one. This preserves the monophonic recorded material but forces it into a stereo channel.